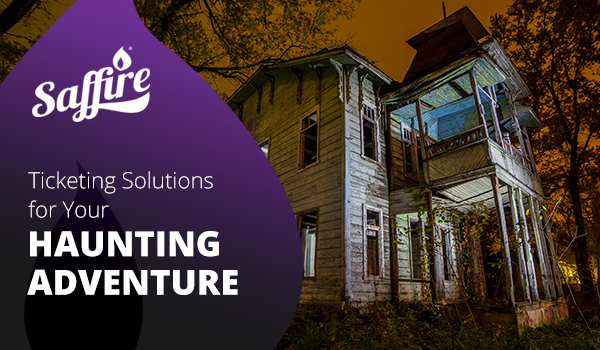
Ticketing Solutions for Your Haunting Adventure

Don’t frighten away guests with long lines or slow entry! With the right ticketing partner by your side, you can deliver a haunting experience for all.

With Halloween right around the corner, we enter the season of spooky hayrides, haunted houses, frightening corn mazes and other spine-chilling haunts! But what’s actually scarier than a headless man running after you with a chainsaw? A ticketing company that doesn’t have everything you need to run a smooth event. 

So, let’s explore the features your haunted attraction should look for in a ticketing partner so you can deliver a horrifying (but efficient) experience to all your guests. 

A Hauntingly Effortless Ticketing Process 

First and foremost, you want to make sure people can actually buy your tickets! Look for a partner with an intuitive interface that’s easy to manage–and bonus points for integration! Plus, Most folks are buying their tickets on their smartphones nowadays, so you’ll want to double-check they offer a mobile optimized platform. 

Next thing to consider is can you offer the types of tickets you want? From general admission and VIP tickets to group discounts and promo codes, the more ticketing options you have, the better you can meet the needs of your audience. 

Making Entry Management Scary Fast  

Don’t let long, slow-moving lines frighten away your guests! Instead, use a ticketing system that delivers their tickets directly into their mobile wallet. With a QR code on their smartphone, it only takes a couple seconds (and less gate attendants) to scan tickets and let folks in. You’ll also want to keep people moving once they’ve entered the attraction, so find a platform with real-time capacity monitoring to avoid overcrowding and ensure safety. Additionally, a robust system should allow you to effectively manage re-entry and prevent unauthorized individuals from entering. Access control is crucial to maintaining order and the spooky experience for guests. 

Frighteningly Good Reporting 

Improving your haunt and its operations should be driven by data! By having access to real-time reports and data collected from customers, you can tailor your marketing efforts to different audiences and optimize pricing strategy based on sales trends. You can also use the data to make your haunted attraction even better for next year–see what specific haunts are most popular and allocate resources during peak times to keep guests enjoying their spine-tingling adventure without long waits or empty scares. 

Scream-Worthy Service 

You might be running a haunted attraction, but that doesn’t mean you want to be ghosted by your ticketing partner! Whether it’s the haunting season or not, you’ll want to find a ticketing partner that is available year round by chat, email or phone. The ideal ticketing partner will be one of your best allies! So be on the lookout for one with a smart and dedicated team to answer your questions quickly, offer emergency support and promptly offer any assistance. With the peace of mind of a support team that always has your back, you can focus on making the spookiest, scariest haunt possible! 

As Halloween approaches, it’s hard to overstate the importance of finding the perfect ticketing partner for your haunted attraction! Look for a partner that can facilitate a seamless ticketing process, keep the lines flowing, collect the right kind of data, and prioritize responsive customer support. With the right partner, you can create bone-chilling experiences that will haunt them long after they leave!
Best Practices for Capturing Video

Lights, camera, action! In the current age of digital content, sharing the magic of live events through video has never been easier. Whether you’re capturing a concert on your fairgrounds or documenting family fun at your festival, knowing best practices for gathering video can set your content apart. In this blog, we’ll explore some of our top tips, tricks and techniques to help you make the most of your video marketing strategy. From the front row to backstage, this guide is your ticket to mastering live event videography! 

Plan Ahead 

No one knows your event! Identify key points of interest around your grounds or venue (like the concert stage or a crowd-favorite ride) and take some practice shots to determine the best vantage point for filming. You’ll want to anticipate lighting conditions, possible obstructions and any challenges, so try filming a rehearsal if you can! 

Choose Your Equipment

Next up, how will you capture the videos? Nowadays, you can capture clear, high-quality video from most iPhones, but you will also want to consider the type of video you’re shooting. If it’s for a social media ad for instance, be sure you’re either filming with your phone horizontally, or you are using a camera that films in multiple ratios. Consider external microphones for better audio sources, and extra batteries or powerbanks so you won’t have to stop filming for a charge. 

Keep Shots Stable

Having a smooth stable shot is a simple way to elevate the quality of your footage. Tripods, gimbals and similar tools eliminate shaky footage, ensuring a smooth shot. Practice with your camera shooting in different angles and with different movements. 

Consider Lighting

Are you going to be filming the crowds during the day or capturing video at a nighttime concert? If you’re filming a show, familiarize yourself with the lighting setup (such as spotlights or stage lighting) and adjust your camera settings accordingly to avoid overexposed or underexposed shorts. 

Composing Your Shot

You’ll want to make sure your main subjects or point of interest are fully captured in the shot! Use the rule of thirds (essentially creating a tic-tac-toe board over the shot, and placing the subject where the lines are intersecting) to create more visually appealing shots, and experiment with different angles and perspectives to add variety to your footage. 

Don’t Forget the B-Roll 

In addition to capturing all the action at your live event, remember to shoot plenty of cutaways and B-roll footage! Getting additional shots of audience reactions and behind-the-scenes moments can add quite a bit of depth and context when editing your final video. 

At the end of the day, capturing video at live events requires careful planning, the right equipment and an eye for detail. With the right composition and footage, you can give your audience an immersive experience they won’t forget. Happy filming!

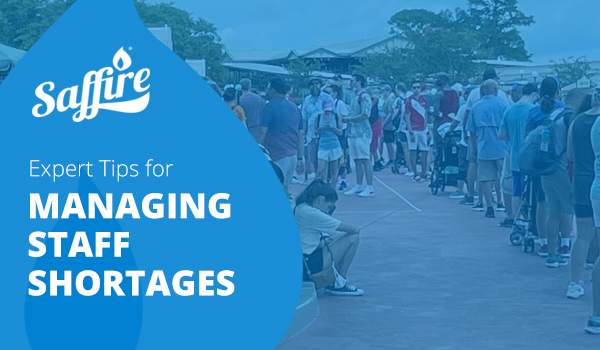
Expert Tips for Managing Staff Shortages

One of Saffire’s Core Values is “We Are Dedicated Team Players.” If you’ve worked with us on a project, we hope you’d agree we are outstanding partners!

Staffing any event can be a challenge, but we’ve noticed a trend with partner events across the country recently: Gate staff challenges, shortages and no-shows.

Is there anything worse than that feeling on opening day or night, when the months of planning and operational work have all built up to that moment when you are about to open the gate and welcome an adoring crowd into your event, only to realize there just aren’t enough people helping get them in? Ticket sellers, ticket scanners, line barkers, security and bag checkers, greeters… each of these staff members matter when you need to get folks into your event, and if you are short or unprepared with any one of the critical staffing areas, your guest experience can really suffer.

Saffire has developed so many software and product solutions to address ticket selling and scanning staffing needs, like our unmanned self-serve ticketing kiosks, iPhone/hip-printer mobile selling stations and line busters, QR code-based signage directing customers to buy their tickets online and come right up to scanning lines, and more. Although we’ve been able to help so many of our partners reduce their reliance on ticketing and gate staff, there are still several crucial roles that must be planned and staffed appropriately for your event’s admission process to succeed.

Planning a reliable staff for your admission is so important. If you are hiring a staffing agency, be sure you communicate your event requirements and ask them about their own backup plans! Relying on volunteers to staff your gates? Engage in constant and consistent communication with your team(s) about expectations and be prepared to provide a good experience for them too. Make it easy on them by making sure your volunteers know where to park, what to wear, what their hours will be and most importantly, THANK them often and in big ways.

Signage!

So much of an event’s success relies on the tiny details, so never underestimate the power of clear signage to help folks identify what line they should be in to buy a ticket onsite, or where they can go if they’ve pre-printed or brought a ticket on their device! If you are using self-service ticketing kiosks, make sure to clearly identify them with signs too, so people use them! If you have a bag-check process, use a sign to tell people in line what to expect to help you make the process efficient!

Conclusion

No matter how prepared you are with a ticketing system, technology and structure, if you don’t have the RIGHT people in place to execute your plan, you’ll be unable to get tickets into customers hands, through the gate, checked by security and scanned for entrance. Plan for your people and be ready with a backup plan so you have a solution if and when you need one in the moment. In the face of staffing challenges, do your very best to provide adequate signage and gate structure to eliminate as much confusion as you can for your customers.

Are Boosted Posts Worth It? The Difference Between Boosted Posts and Facebook Ads

If you’re new to Facebook advertising, you might be wondering about boosted posts – like what they’re used for, how to set them up and whether they’re the same as Facebook ads (spoiler alert: they’re not!) While boosted posts sometimes get a bad rap, they can still be useful in your social media strategy.   … Continue reading “Are Boosted Posts Worth It? The Difference Between Boosted Posts and Facebook Ads”

If you’re new to Facebook advertising, you might be wondering about boosted posts – like what they’re used for, how to set them up and whether they’re the same as Facebook ads (spoiler alert: they’re not!) While boosted posts sometimes get a bad rap, they can still be useful in your social media strategy.


In this guide, we’ll explain the ins-and-outs of boosted posts, what they’re used for and how to set them up.


Boosted Post Vs. Facebook Ad: What’s the difference?


Boosted posts are the most simple way to run an ad on Facebook. They don’t have the same types of targeting, features and power you can expect from a full Facebook ad, but they are a great option for anyone who is new to the ad world.


People love boosted posts because you can quickly and easily create them from content you already have on your feed! Just post your content, click “boost this post” and boom – you’re pretty much done.  Once started, boosted posts allow you to target for engagement (more likes or comments), traffic (more clicks to your website), or messages. With as little as a few clicks and $10, you can reach more people and increase your engagement with a boost!


Facebook ads are a little more tricky, but in turn they offer you much more power. To get started you’ll have to create an Ads Manager account and take some time to learn the ins-and-outs of the Facebook Ads world.


Anyone that’s ever been in the Facebook Ads Manager knows that it can be a long confusing process. Unlike boosted posts, Facebook ads open up a whole world of possibility when it comes to targeting. While you may target people who have been to your website with a boosted post, with Facebook ads you can get even deeper – like targeting people who have been to your website, are also moms with young children and who live in Texas. Plus, you’ll get many more ad objectives like conversions (getting people to take a specific action on your website like buying tickets or signing up for a newsletter), event responses and video views.  And don’t even get us started on all the different templates you can choose to show content in!


Just remember that Facebook ads won’t show up on your regular feed. Instead, they’ll be shown only to a specific audience that you select through targeting.


Should I Create a Boosted Post?


While full Facebook ads are always a good idea for organizations looking for more than just engagement, like merch or ticket sales, boosted posts still have their uses. They’re a great way to increase engagement on content already posted to your page in an algorithm that makes it hard for businesses to get noticed. Plus, they are cheaper and easier to use.


We recommend boosted posts to anyone who is just starting out. They’re a great way to get familiar with Facebook targeting and optimization, and it’s better to run boosted posts than no ads at all. Use boosted posts as a stepping stone until you’re ready to run full-blown Facebook ads. They will help you get comfortable with the ins-and-outs when you’re ready to take the leap!


If you find you’re still scared of setting foot inside the Facebook Ads Manager, there are tons of resources to help you get started with full Facebook ads (and Saffire is always here to help!)


So, I’ve Decided to Boost A Post. What Now?


Boosting a post is easy! Just follow these simple steps.


  1. Post your content. Include your photo or video and some fun, interesting text!
  2. Click the bright blue “Boost Post” button.
  3. Select your objective: Do you want to send people to your website, get more engagement on your post, or encourage people to send you messages?
  4. Choose your audience. Choose between targeting specific demographics, people who like your page or people who like your page and their friends.
  5. Select your budget. The minimum is $1 a day and at least $10. After you select your budget Facebook will give you an estimate of how many people they expect your post to reach.
  6. Set your post duration. This is how many days you want your post to run.
  7. Click boost.
  8. Congrats! You have a boosted post.


In the end, boosted posts are a great starting place, but we don’t recommend sticking with boosted posts forever. When you are ready to start creating full ads, reach out to Saffire or read more about getting started.

What to Post on Social Media When You’re All Out of Ideas

We’ve all been there: It’s been days, maybe even weeks since you’ve posted on social media.   Then, that dreaded notification pops up from Facebook: “[So-and-so number of] people who like your page haven’t heard from you in a while. Write a post!”   So, what do you do when you know it’s time to … Continue reading “What to Post on Social Media When You’re All Out of Ideas”

We’ve all been there: It’s been days, maybe even weeks since you’ve posted on social media.


Then, that dreaded notification pops up from Facebook: “[So-and-so number of] people who like your page haven’t heard from you in a while. Write a post!”


So, what do you do when you know it’s time to post something, but your brain is drawing a blank? After checking your content calendar, of course, try using one of these five ideas to help you get creative on social media!


Here’s What to Post on Social Media When You’re All Out of Ideas:


  1. Participate in Fun Holidays


Who knows what day National Ferris Wheel Day is on? Hint: It shares the same day as everyone’s favorite date night! (Valentine’s Day!)


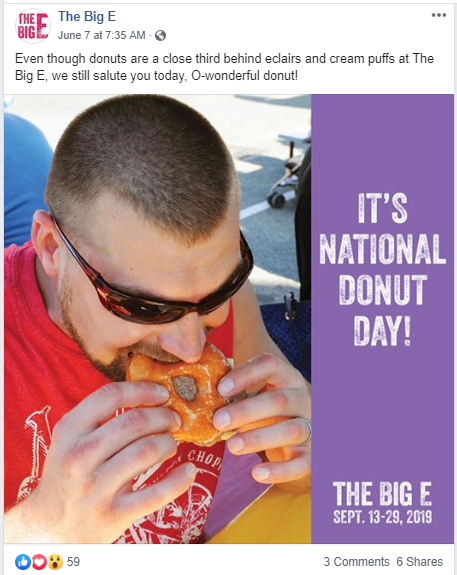
There are tons of fun holidays from National Ferris Wheel Day to National Best Friend Day that are perfect for adding to your social media calendar! Not only are they quick and easy content, but they’re a perfect way to participate in timely and highly shareable content!


As a festival or event, using national holidays to promote food and fun at your event is a no-brainer. Destinations and venues can find luck in highlighting local eats, partners and shared posts from your community.


Big E Donut Day


  1. User-Generated Content from Your Fans


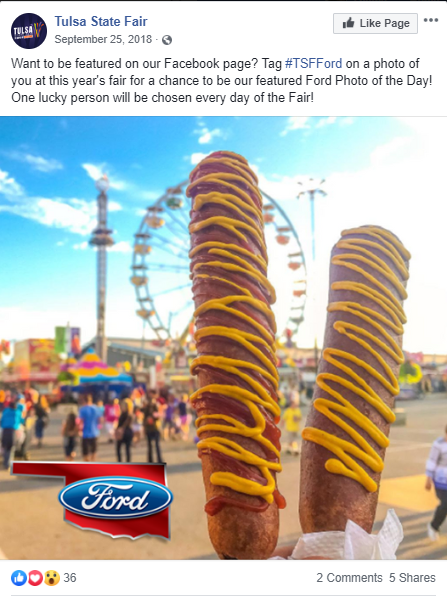
There are lots of fun things about running social media for events, festivals and destinations, but possibly the best thing of all is running into people that ADORE spending time there! Luckily for us, people who love spending time at your event often love sharing photos.


User-generated content is a great way to fill your feed with content that is valuable, trustworthy and on-brand.


We recommend setting up a hashtag and asking your followers to tag you in their photos, that way there is an easy-to-find space where fans can share their posts.


Tulsa UGC

  1. Promote upcoming events or specials

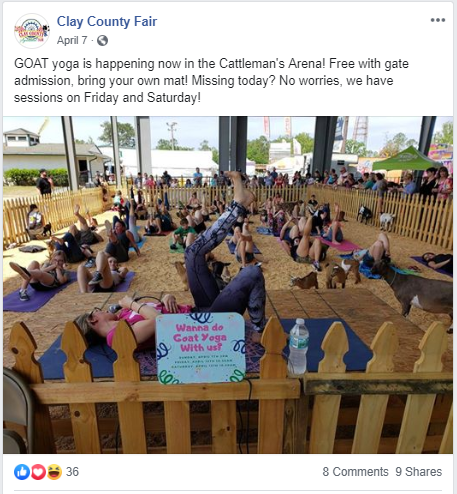
Got a sweet event coming up that your followers just can’t miss? Post about it!


Even if your event is a few weeks or months away, try getting the excitement going with sneak peeks or behind the scenes footage! Not only does it open up the opportunity to create hype and promote your event – sneak peek content gives you another way to build a more authentic relationship with your followers.


Clay County Goat Yoga


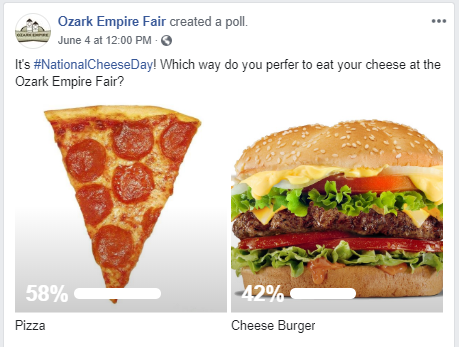
  1. Ask Questions, Create Polls or Play Fun Games with Your Followers

Asking questions is one of the best ways to increase engagement on your social media! The best thing about using questions and polls is that it not only encourages comments, but it also gives insight into the personalities and preferences of your customers.


Here’s some fun ideas to get you started:

  • Would you rather…?
  • This or that?
  • If you could….?
  • Fill in the blank
  • What is your favorite…?

Ozark Empire Poll

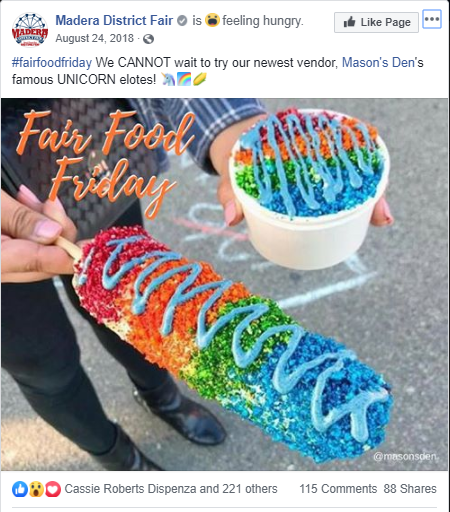
  1. Participate in Daily Hashtags

Daily hashtags are popular hashtags on social media for certain days of the week. You’ve probably seen some of the popular ones like #MotivationMonday, #TravelTuesday or #ThrowbackThursday.


When in doubt, combine a daily hashtag with a fun photo! They’re a great way to fill your feed with content that is fun, shareable and creates extra reach.


Madera District Fair


There you have it: 5 ideas for posting on social media when you have no idea what to post. Get creative with these ideas, and we’re sure you could fill a whole calendar with them!


Good luck and happy posting!

How to *Actually* Sell Tickets with Facebook Ads in 4 Easy Steps

Billions of people use Facebook every single day. With numbers like that, it’s easy to see why Facebook is one of the best places to sell tickets for your event! Facebook ads offer an affordable but effective way to get your event in front of thousands – and even millions – of people online, all … Continue reading “How to *Actually* Sell Tickets with Facebook Ads in 4 Easy Steps”

Billions of people use Facebook every single day. With numbers like that, it’s easy to see why Facebook is one of the best places to sell tickets for your event! Facebook ads offer an affordable but effective way to get your event in front of thousands – and even millions – of people online, all without ever leaving your office!


Here at Saffire, we truly believe that selling advance tickets online can make a world of difference for your event. Every year, we work with hundreds of different events. Though all of our clients are unique -different types, sizes and audiences – we all have the same goals: selling out fantastic events & making the process fast, easy and fun for customers! What’s easier than buying your ticket online and showing up completely worry-free?


Setting up Facebook ads for your event can be intimidating, but it is one of the best ways to get advanced sales up and running. We hear from clients every day wondering “Where do I go? What do I click? What should the ads look like, and who should I target?” The great news is that setting up ads can be easier than you think. Plus, if you are interested in running more advanced ads or need some additional help – Saffire is just one call away.


Here’s How to Create Facebook Ads That Actually Sell Tickets in 4 Easy Steps:


  1. Plan

Before you dive right into your Facebook ads, begin by creating a plan for your content. Creating a strategy will help you cut down time, reach the right audience and stay on track with your goals. Start by asking yourself a few questions:


What Is Your Goal for Each Ad?

Before you get started, it’s important to create a specific and actionable goal for what you’d like to accomplish with your ads. This many seem obvious. “We want to sell tickets – duh!” But keep in mind that people rarely buy tickets the first time they hear about an event. That’s why Saffire recommends creating a series – or “campaign” of multiple Facebook ads used to inform and excite your customers before eventually getting them to buy. For this reason, Facebook offers a few different types of ads meant to promote your event in different ways.


Whether your goal for this specific campaign is to gain awareness (we recommend running awareness campaigns three to six months before your event) or to get off the ground running with ticket sales, choose a goal that is measurable and realistic. For an awareness campaign, your goal might be something like reach 5,000 people. For ticket sales, try something like sell 500 tickets in two weeks.


What Is Your Budget?

There are a couple of different things that will affect the reach of your ad including your audience, engagement and budget. Decide on a budget early so you can plan out your campaign effectively. Generally, we recommend budgeting about $100 for a two-to-three week ad.


  1. Create Content

Once you’ve got your strategy planned and ready to go, it’s time to actually create your content. An effective Facebook ad requires two things: an eye-catching photo or video and copy for your description.


For your photo or video, we recommend choosing something eye-catching from a previous or similar event. Make sure that your graphic shows potential customers what there is to love about your event. What makes your event special? The amazing food? The superstar talent? Or maybe you’re running a really great deal or giveaway! Whatever it is, choose one FOMO-worthy feature and focus on that. Then write a description that draws people in. We recommend keeping it short and sweet, and don’t forget your call to action!


If your having trouble coming up with ideas, checking out ads from your competition is a great way to keep yourself in the game with fresh ideas. Check out Facebook’s new Ads Library to check out active campaigns.


  1. Target

Targeting is one of the most important pieces of creating an effective ad. What’s a great ad without the perfect people to show it to? When it comes to targeting your ad to the right people, there are a few things you should be thinking about:


  1. Area – Targeting your ad to people who live close by.
  2. Demographics – Targeting your ad to people who fit your audience demographics. This might mean targeting parents if your event is a family-friendly fair or targeting 21-35 year-olds if your event is a hip music festival.
  3. Interests – Targeting your ad to people who have liked similar things on Facebook. This might mean targeting people who already like your Facebook page, have liked similar events in the past or even people who follow your concert talent or partners!


Don’t forget to retarget, retarget, retarget! It’s easy for people to get distracted online. Sometimes all they need is a nudge (or 3) in the right direction. Studies have shown that people are 80% more likely to respond to a retargeting ad than a regular campaign! Don’t take that number for granted. It’s one of the most important reasons Saffire recommends creating a campaign instead of running just one ad – and it can be extremely effective!


There are a few ways you can use retargeting to work in your favor including: retargeting people that have interacted with another ad in your campaign, retargeting people that have bought tickets to a past event using custom audiences and retargeting people that have been on your website recently.


  1. Test, Refine & Do It Again


Finally, it’s time to let your ad run! Once your ad has been running for a day or two, you can check its performance in the Ads Manager. Over time, your analytics will be your guiding light to help you tweak your ads for the best results. Remember, Rome was not built in a day – and neither is a successful ad campaign. Testing and tweaking are the keys to figuring out your audience and creating ads the resonate.


If you’re still having trouble creating the perfect ad, have no fear! Saffire’s marketing team is available to help craft an ad that is just right for your event. Chat with your coach or salesperson to learn more about our ad services.


How to Actually Sell Tickets with Email Marketing in 2019

Email marketing has been around pretty much since the internet was born. Social media and search engine ads have stolen some of its shine in recent years, but we still believe in the power of good ol’ email! Why? It’s (almost) free, it’s accessible and everybody on the internet has one! With so many people … Continue reading “How to Actually Sell Tickets with Email Marketing in 2019”

Email marketing has been around pretty much since the internet was born. Social media and search engine ads have stolen some of its shine in recent years, but we still believe in the power of good ol’ email! Why? It’s (almost) free, it’s accessible and everybody on the internet has one! With so many people using ad blockers and scrolling through their social feeds at the speed of light, email is also the perfect way to capture someone’s attention. Here’s the top ways to keep up with email trends that actually sell tickets in 2019:


  1. Personalization and Segmentation

Millennials have spoken, and they want custom content. We’re talking about diving a little deeper than your standard email {!Contact.FirstName}.  Huge digital companies like Amazon, Coca-Cola and the Austin City Limits Festival have changed the way we market by placing personalization at the center of their strategies. Think about how you react when an ad pops up in your inbox or newsfeed for something that you’ve already been lusting after for days. We’d bet your typical scroll reflex slows down and you’re much more likely to give it a click.

Next time you send out a marketing email, ask yourself if you’ve included these relevant contacts: Customers who have purchased tickets for the same or similar events, customers who have purchased merchandise, customers with abandoned carts, customers who have shown interest in the event on your website.

More importantly, think about who you SHOULDN’T include. Instead of sending every email to one giant list, segment your lists based on what each person is truly interested in. In other words, don’t waste your time sending kids story time emails to the rowdy 21+ crowd. While it may seem like you’re increasing your odds by increasing your reach, what you’re really doing is making it more likely for someone to opt-out, or worse, stop engaging with your event altogether.


  1. Clear and Compelling Call to Action

If you want your reader to buy anything, you’ve got to create engaging calls to action that compel your readers to follow through right away. Once a reader clicks away – that’s it. You’ve pretty much lost them, at least for now.

Many people see the call to action as a one-line sentence or link at the end of your email (Buy Tickets, Sign Up, Follow Us). While that’s an important piece to the puzzle, remember that the rest of your email is important, too. No one ever buys something without a compelling “why.”  What is it about your event that makes it a good use of their time? The delicious food? Great photo ops? A spectacular line up? Focus on one element and tell a really good story. Then hook them at the end. Storytelling is the best way to help people really connect with your brand, instead of just feeling like you’re trying to sell them something.


  1. It’s All About the Follow-Up

Here’s the great thing about selling online: you can essentially chase down a potential customer without looking like a total creep. It’s easy for people to get distracted online. Sometimes what people need is just another nudge (or 4) to lead them in the right direction.  Moz found that you can bring your conversion rate to up to 41%, compared to a 1-2% average by simply remarketing to customers who appear interested, but just haven’t bought yet.

Now, we’re not advocating for spamming people’s inboxes. Instead, what we’re talking about is using a well-timed, well-planned campaign to keep people thinking about your upcoming event. An email campaign for an upcoming festival might look something like this:

Email 1: Event announcement

Email 2: Early bird sale offer

Email 3: Line up announcement

Email 4: Second sale announcement

Email 5: Reminder: Two weeks left to buy tickets

Don’t forget to create an email for people who have abandoned their cart or who have high click & open rates but haven’t bought a ticket yet. It’s likely these people are interested, they may just need an additional nudge. You don’t have to follow up solely through email, either! Use retargeting to reach people who have recently purchased or engaged with your brand on their newsfeeds, Google search and using plain ol’ website banners.


  1. Make an Offer They Can’t Refuse

Sales are the oldest trick in the book for a good reason: they work. This one’s old school, but we still believe that a good sale or giveaway is one of the best ways to sell tickets. Just make sure that the offer is valuable for both you and the client.


Email marketing is still one of the best tools to connect with your audience and sell tickets, but it will only work if you are creating relevant content and humanizing your brand.


How to Use Facebook’s Magic 3D Photo Feature

The world’s most used social media app added a brand new feature! It’s called 3D Photo, and it does exactly what it sounds like it does – well, kind of. The new feature adds distance between the foreground and background of a photo, making it look “3D.” Or, as Facebook puts it, like you’re looking … Continue reading “How to Use Facebook’s Magic 3D Photo Feature”

The world’s most used social media app added a brand new feature! It’s called 3D Photo, and it does exactly what it sounds like it does – well, kind of. The new feature adds distance between the foreground and background of a photo, making it look “3D.” Or, as Facebook puts it, like you’re looking at something “through a window.”

When you view a 3D photo, you can scroll or tilt your device to make the foreground of the image look like it’s moving in space. Facebook says the feature is “a new way to share your memories and moments in time with a fun, lifelike dimension.” The bad news? It’s only available on iPhones 7+ and up.

Here’s how to use it:

  1. Take a photo using portrait mode on your iPhone.
  1. Open your Facebook app.
  1. Search for and like the Facebook 360
    This is the secret trick! Facebook has given a few select people automatic access to the feature. For most people though, liking this page is the key to unlocking the 3D photo option in the app.
  1. Close and reopen the app.
  1. Create a new post. You should now be able to see the “3D Photo” option in the list of features to add to your post. Click it. A list of available photos should pop up.
  1. Select your photo and wa-lah! Your 3D photo should now be available to post.

We see this feature adding all kinds of fun to our timelines! Photos with backgrounds that pop (we’re looking at YOU fairs, festivals and destinations!) come to life with 3D effects. For some eye-catching options, have a staff member ride your Ferris wheel with midway lights blinking in the background. If you live in a destination with water, waves crashing to the beach in the background is sure to be a pleaser!

Have fun! We can’t wait to see what you create.

Create Memorable Activations through Experiential Marketing

You may have heard some buzz about experiential marketing lately, but what exactly does it mean? After the Saffire Marketing Team attended the branding track of South by Southwest this year, we got a pretty good taste of experiential marketing firsthand! This unique marketing strategy helps engage audiences with awareness of a brand, by allowing … Continue reading “Create Memorable Activations through Experiential Marketing”

You may have heard some buzz about experiential marketing lately, but what exactly does it mean? After the Saffire Marketing Team attended the branding track of South by Southwest this year, we got a pretty good taste of experiential marketing firsthand! This unique marketing strategy helps engage audiences with awareness of a brand, by allowing them to be a part of the brand creation itself rather than just passively receiving a message. The brand’s value is activated, or realized by the consumer, creating a stronger relationship between the consumer and the brand.

SXSW has increasingly become one of the greatest places to show off your brand to festival attendees, and during the conference, downtown Austin becomes one giant advertisement for 10 days. Instead of online campaigns, brands focus on taking over bars, restaurants and venues to transform them to experiential marketing wonderlands. Some of the activations this year included: German Haus, E.U. House, Peru House, Pinterest House, and Snickers House. These brands swooped in and transformed trendy bars into billboards full of free food and drinks, swag, and live music.

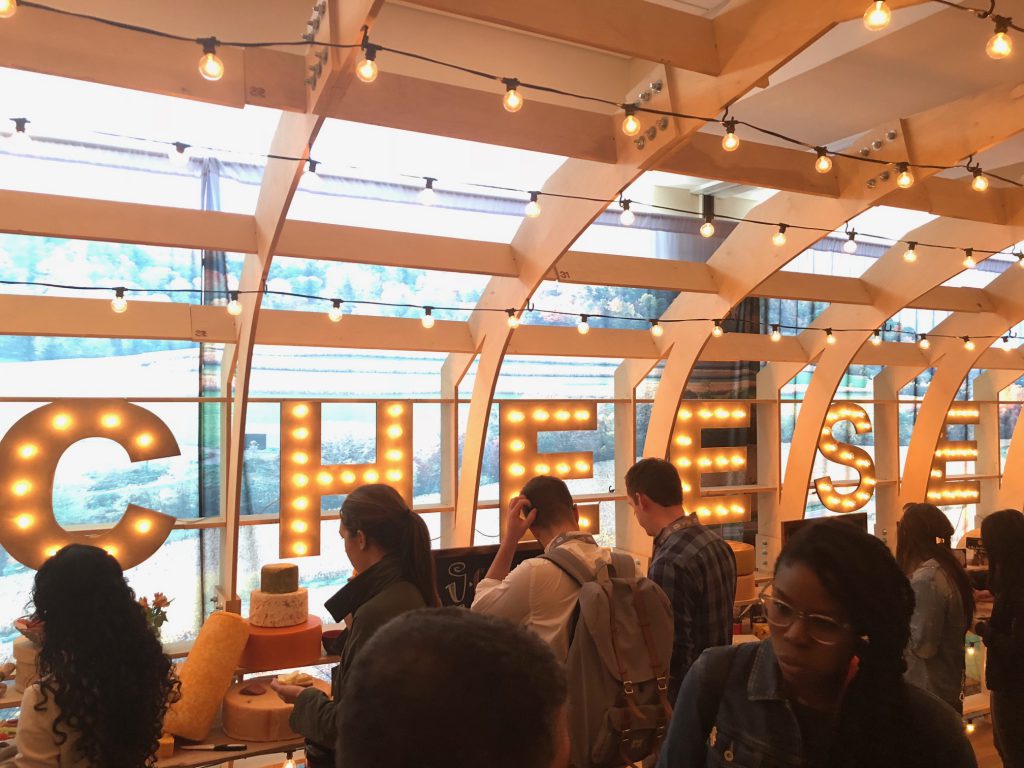
On a tamer side of things, some brands chose to have small lounges scattered throughout hotel and convention meeting spaces. These typically monotonous meeting spaces were transformed into places for attendees to relax, recharge, rehydrate and learn a few things about the lounge’s hosts. Two of our favorite examples were the Brazil Lounge and a giant cheese spread by the state of Wisconsin. It is definitely better to TASTE cheese from Wisconsin rather than read about it on social media!

One of the best activations was the Google Assistant Fun House, an entire house focused on immersing the consumer into a smart house powered by Google Assistant. Check out the house by clicking on the video below:

How your organization can utilize these fun ideas? It doesn’t have to be super fancy! All you have to do is let users experience your brand or your sponsor’s brand firsthand. Here are examples of things that your organization can implement:

  • Experiential marketing is a great way to grow an event and offer your sponsors something different and unique. Have a sponsor cover the cost of a lounge, bar or booth and let a sponsor deck it out with their branding. Attendees LOVE free samples of any kind, so encourage sponsors to come with fun giveaways. Rather than a traditional booth for a sponsor, make it something more fun!
  • Have a brand? Why not travel with it! Look for outside events where you can bring your brand to life.  This works especially well if you are marketing a destination–bring food samples, mini drinks or small crafts to events and festivals and let consumers get a taste! As mentioned above, various destinations had activations at SXSW, including Germany, Peru and Fort Worth, Texas!
  • Set up a pop-up booth about your organization in a market you are hoping to grow. (You can either partner with that city to do something in your hometown or at your event, or just get permission first.) Pick somewhere with high traffic like a park and do a fun giveaway! Offering a special discount to people that visit your event or destination after meeting you at a pop up is also a great way to measure the ROI on your effort.

As our world becomes more digital, sometimes the best way to connect with your audience is to let them experience your brand off-screen. Think of another way you can utilize experiential marketing in your marketing mix?  Feel free to share it with us!


Facebook Videos Made Easy

The mere thought of creating and starring in a marketing video can be terrifying! Well, guess what? Times are changing! You no longer have to star in a video to have perfectly curated video clips! Did you know that 85% of Facebook videos are viewed without sound? That’s right – that mean’s there’s no pressure … Continue reading “Facebook Videos Made Easy”

The mere thought of creating and starring in a marketing video can be terrifying! Well, guess what? Times are changing! You no longer have to star in a video to have perfectly curated video clips! Did you know that 85% of Facebook videos are viewed without sound? That’s right – that mean’s there’s no pressure fur us as marketers to stand in front of the camera!  Not only that, but native videos on Facebook have 10 times higher reach compared to YouTube links you might share in your Facebook post! We are going to focus on what YOU CAN DO TODAY to get a native Facebook video planned, created and posted.

The best part is that you don’t even need any video editing software! It’s as simple as choosing some of your photos, sticking some text on them, building the video on Facebook and adding some music to it!

  1. Create a Storyboard: Since this is a quick and easy exercise, we will keep the storyboard creation short and simple. First, you will need to decide what you want to showcase in your video. Then, decide how many images you would like to showcase in your video (you can choose between 3 – 10 images). Then, if you want the graphics to deliver a message, write out what you want each image to say. Remember, all images will be on the screen for the same duration, so keep the text SHORT and impactful. You can choose between 0.5 and 5 seconds per image. Finally, decide what kind of feel you want the video to have (upbeat, chill, funny, country/western, etc.).
  2. Select your Background Music: Based on what kind of feel you want your video to have, now is the time to select your music! Don’t worry, you don’t need a guitar! In December of 2017, Facebook rolled out Sound Collection, which is a collection of royalty free and high-quality audio tracks and sound effects. The only limit here is that these audio files can only be used on Facebook and Instagram. Sound Collection allows you to search and filter songs by genres, moods, lengths, vocal type and sound effects by categories and lengths. Check out the variety of options here.
  3. Add Some Text: Saffire recommends using a simple, free photo editing tool like Canva.com. You can quickly and easily put together stunning graphics with your message on them. Check out Canva’s How-To Guide here.
  4. Create your slideshow in Facebook! Once logged into Facebook, click on “Write a Post” and select the camera icon. From the drop-down menu, click on “Create a Slideshow”. A pop-up window will appear. This is where you can upload your own images, chose your music, image duration and transition options of the slides. When you are happy with your slideshow, you can select “Create Slideshow” in the bottom right corner of the page. In a matter of two minutes, you will have a video slideshow on your page. Ta-da!Facebook also gives you the option to boost the post so that your video slideshow will be seen by even more of your target audience! If you have any other questions about the process you can follow this easy step-by-step guide here.

The Saffire Marketing team wanted to show you just how easy and quick you can create a video, so we put together a slideshow video of our own! We only used Canva and made this in less than an hour. Check it out below!

FBSlideshowVideo

Making an effective social media video does not have to be a daunting task. Facebook’s slideshow video generator is the easiest way to make an eye-catching video that will resonate with your audience!